Nowadays in 2018, there are still many useful ActiveX components (DLLs and OCXs) that was wrote with the old (and lovely) VS6/VB6 developing environment. Unfortunately, some of those components cannot be use in the earliest versions of Visual Studio because of the DEP (Data Execution Prevention) issue.
Gladly, Microsoft add the ability to use those component in the Visual Studio 2017 easily 🙂
Here are the stages to add the ability to use VS6/VB6 ActiveX component in Visual Studio:
1) Open Visual Studio 2017
2) Click on ‘Get Tools and Features’ in the ‘Tools’ menu.
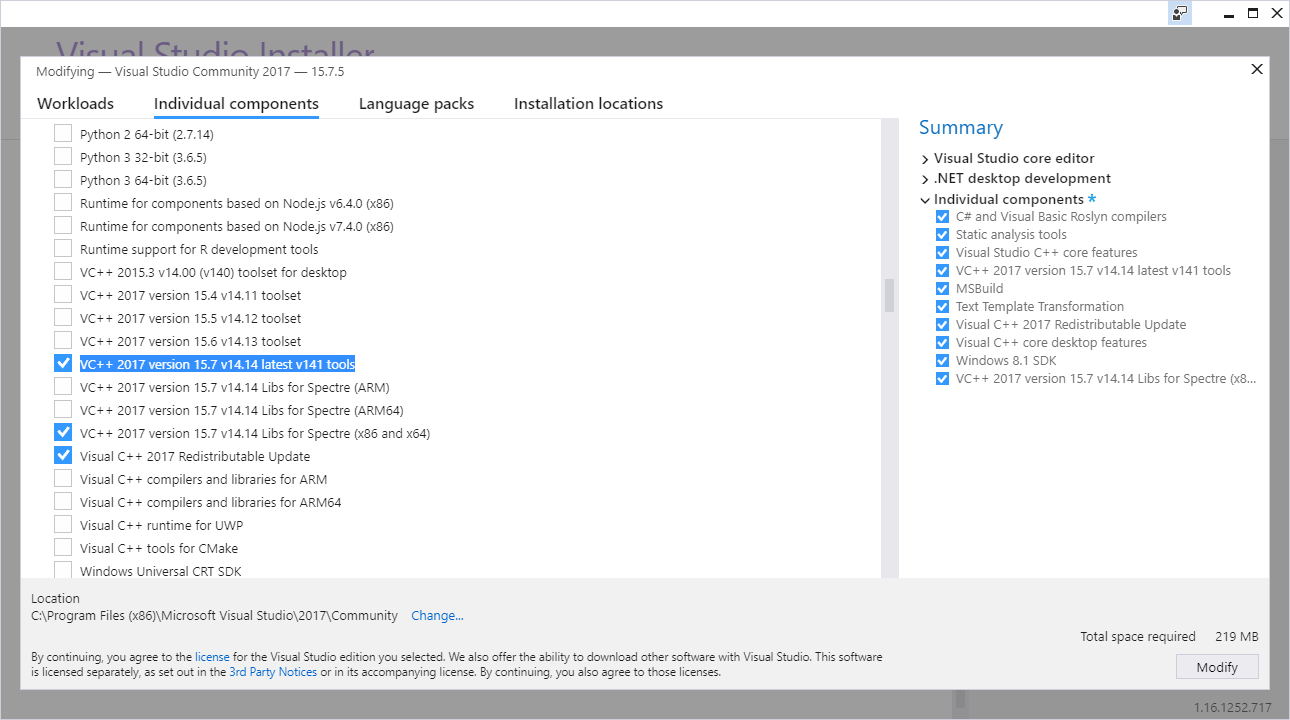
3) In the ‘Modify’ window click on the ‘Individual Components’ tab.
4) Mark the ‘VC++ 2017 version 15.7 v14.14 latest v141 tools’ option in the list.
5) Click on the ‘Modify’.
6) Wait for Visual Studio 2017 to finish the installation.
7) Open the project that you want to add the VS6/VB6 components.
8) Go to the project properties.
9) Click on the ‘Build Events’ tab.
10) Add the above command to the ‘Post Build’:
call "$(DevEnvDir)..\tools\vsdevcmd.bat"

"$(DevEnvDir)....\VC\Tools\MSVC\14.13.26128\bin\Hostx86\x86\editbin.exe" /NXCOMPAT:NO "$(TargetPath)"
That’s It 🙂
From now on you can use the VS6/VB6 components in your Visual Studio 2017 projects.
Remarks